# Deploying Kubernetes cluster
HPE Ezmeral Container Platform Kubernetes workflow allows you to add dedicated hosts, create one or more clusters with different versions, add one or more tenants to a cluster, and then create virtual nodes or containers that run in virtual clusters (pods) to run Kubernetes applications. For more details on Kubernetes installation, see http://docs.bluedata.com/50_k8s-kubernetes-worker-installation-overview.
# Kubernetes host installation
Login to HPE Ezmeral Container Platform web interface. Navigate to KUBENETES drop- down on the left pane. Click Hosts tab and add Kubernetes hosts. Figure 19 depicts how to add Kubernetes hosts.

Figure 19. Adding Kubernetes host
Enter the IP List of the worker host(s) and provide required credentials and click Submit. This will install HPE Ezmeral Container Platform on the selected host(s). This prepares the HPE Ezmeral Container Platform software for installation on the selected host(s).
Configure and confirm storage allocation for this node or abort the installation on a host. Figure 20 depicts how to configure and confirm storage allocation for the node.
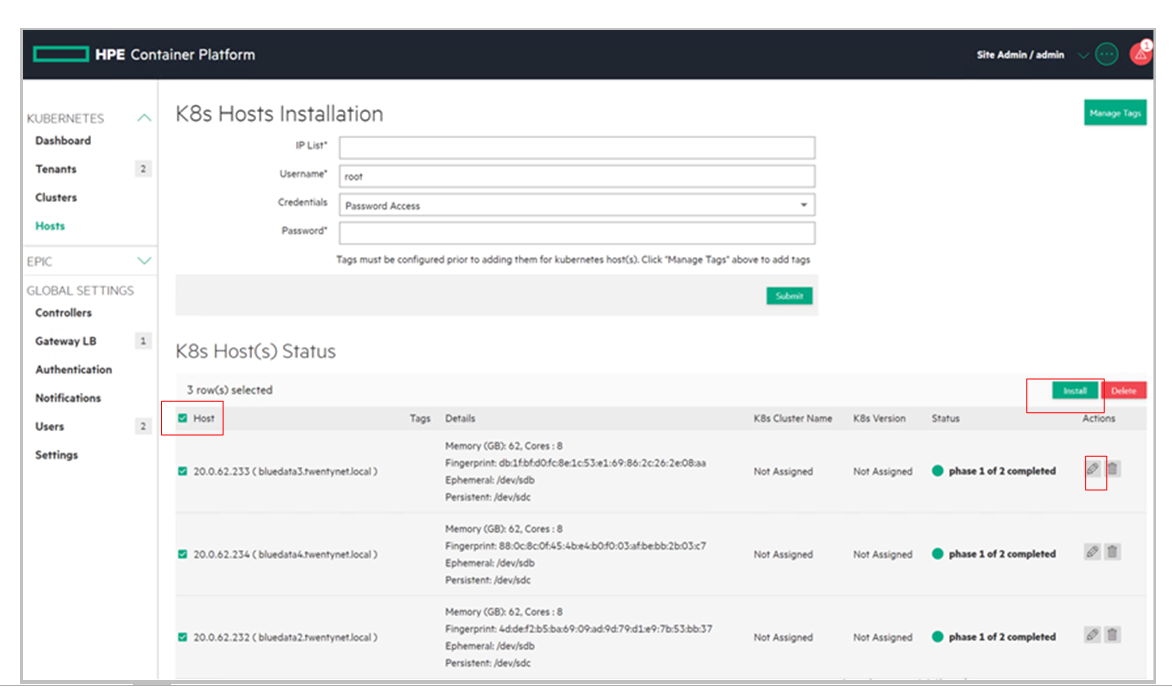
Figure 20. Configuring and confirming storage allocation for the node
After the successful installation of the worker host, the status of the node(s) will be in Ready state. Figure 21 depicts the status of K8s Host.
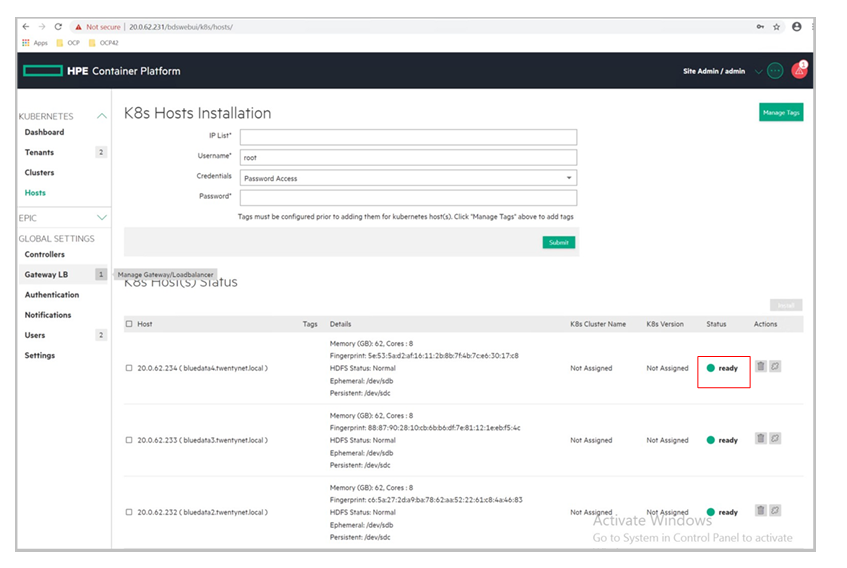
Figure 21. Status of K8s host installation
# Creating a Kubernetes Cluster
To create a new Kubernetes cluster, perform the following steps:
Login to HPE Ezmeral Container Platform web interface. Navigate to KUBENETES drop- down on the left pane. Click Clusters tab and click Create Kubernetes Cluster on the right corner of the window. Figure 22 depicts the creation of Kubernetes Cluster.

Figure 22. Creation of Kubernetes Cluster
Enter a name for the new Kubernetes cluster in the Name field.
Enter a brief description of the new Kubernetes cluster in the Description field.
Enter the reason for creating this Kubernetes cluster in the Reason field, if desired.
In the Masters row of the Hosts table, hover the mouse over a host in the Available column. A right arrow appears. Move the mouse to this arrow, and then click the arrow.
The selected host moves from the Available Hosts column to the Selected Hosts column. If you make a mistake, hover the mouse over a selected host and then click the left arrow to move it back to the Available Hosts column. You must select three(3) Master host(s) to have a quorum. Selecting three(3) Master hosts provides high availability protection for the Kubernetes cluster.
By default, HPE Ezmeral Container Platform places a taint on the Master hosts that prevents them from being able to run pods. You must untaint these hosts if you want them to be available to run pods, as described here (link opens to an external website in a new browser tab or window).
Repeat Steps 4 and 5 for the worker hosts. You may add as many worker hosts as needed to this cluster.
Click Next.
Figure 23 depicts the details of Kubernetes Cluster.
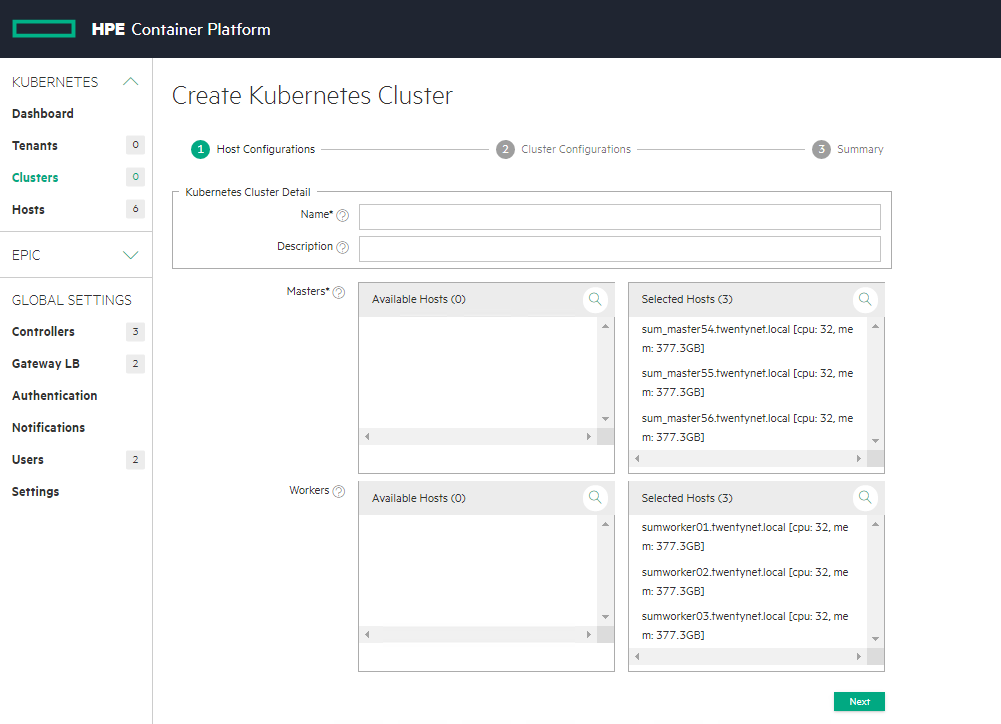
Figure 23. Details of K8s Cluster
Use the Kubernetes Version pull-down menu to select the version of Kubernetes to install on the new cluster. To upgrade this version later, see Upgrading Kubernetes. By default, the HPE Ezmeral Container Platform provides the three most recent versions of Kubernetes recommended by the Cloud Native Computing Foundation (CNCF). This allows you to use the most recent Kubernetes version. For more information, see this article (link opens an external website in a new browser tab or window). Specific versions of upstream can be on board via a manifest stored in a local repository (see Air Gap Tab).
Enter the CIDR (Network range and mask) to use for the pod(s) in this cluster in the Port Network Range field. HPE Container Platform pre-installs and configures the Calico and Flannel Kubernetes CNI plugins and provides a default for the Pod CIDR within a private range. You need to only update these parameters if they conflict with other ranges that are already in use. For additional information, see this article. (Link opens an external web site in a new browser tab or window).
Enter the CIDR (Network range and mask) to use for the endpoint service(s) in this cluster in the Service Network Range field. HPE Ezmeral Container Platform pre-installs and configures the Calico and Flannel Kubernetes CNI plugins and provides a default for the Service CIDR that is in a private range. You need to only update these parameters if they conflict with other ranges that are already in use. Check the Choosing IP Address section. For more information, see this article. (Link opens an external web site in a new browser tab or window).
Enter the DNS domain to use for the service endpoints in this cluster in the Pod DNS Domain field.
If desired, check the HPE Nimble Storage checkbox to install Nimble CSI storage drivers. For more information, see Nimble CSI.
Enter the path to the Kubernetes root CA certificate in the Kubernetes Root CA Certificate field. This is the certificate authority that Kubernetes will use to generate the certificates needed for various Kubernetes components, such as etcd and auth proxy/front-proxy. Click the Browse button to open a standard Open dialog that allows you to navigate and select the desired file.
Enter the path to the Kubernetes root CA private key in the Kubernetes Root CA Private Key field. This is the private key portion of the root CA certificate. Click Browse button to open a standard Open dialog that allows you to navigate and select the desired file.
If you are satisfied with your changes, then click Next to proceed. Alternatively, you can click Previous to return to Step 1: Host Configurations screen.
Review the summary of resources to be assigned to this cluster, and then either click Submit to finish creating the new Kubernetes cluster or click Previous to return to the previous step. Figure 24 depicts the details of host.
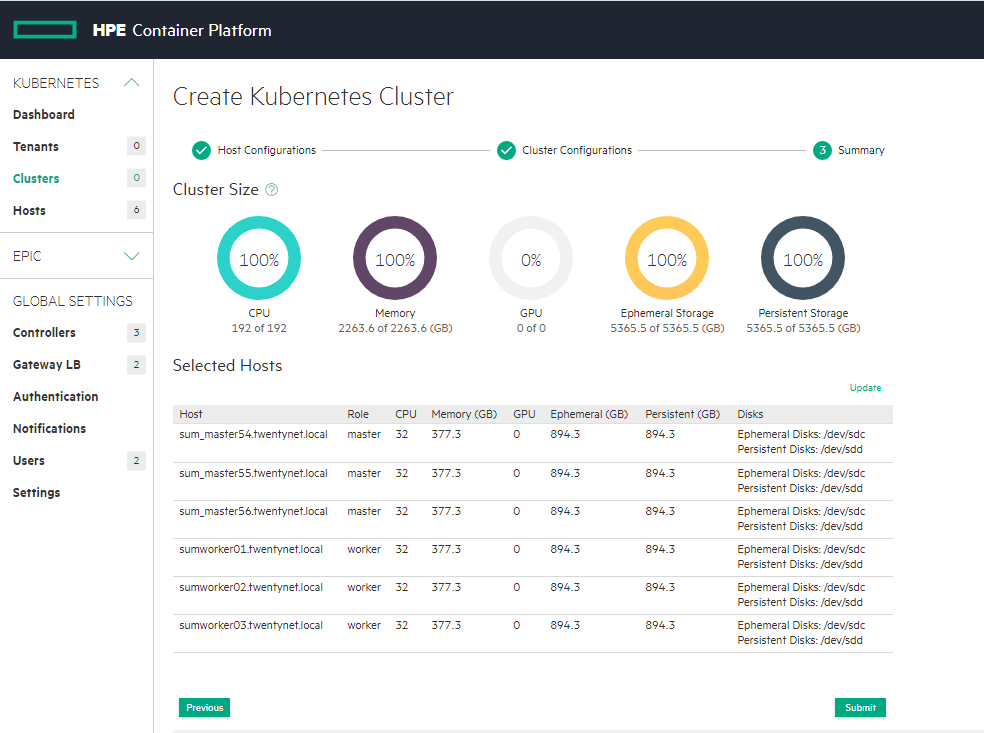
Figure 24. Details of host
# Launching Kubernetes Dashboard
To bring up the Kubernetes Dashboard for the cluster that was just created, click the Dashboard icon for the cluster.
Click the download icon to download the kubeconfig file.
For more details on how to configure or use the kubeconfig on your client, see https://kubernetes.io/docs/concepts/configuration/organize-cluster-access-kubeconfig/. Figure 25 depicts the Dashboard icon.

Figure 25. Dashboard icon
Select the Dashboard icon to open up a new window.This allows the user to access the Kubernetes Dashboard with an Auth token.Highlight and copy the token and select Proceed to Kubernetes Dashboard. Figure 26 depicts the HPE Ezmeral Container Platform launching Kubernetes Dashboard- Auth Token.
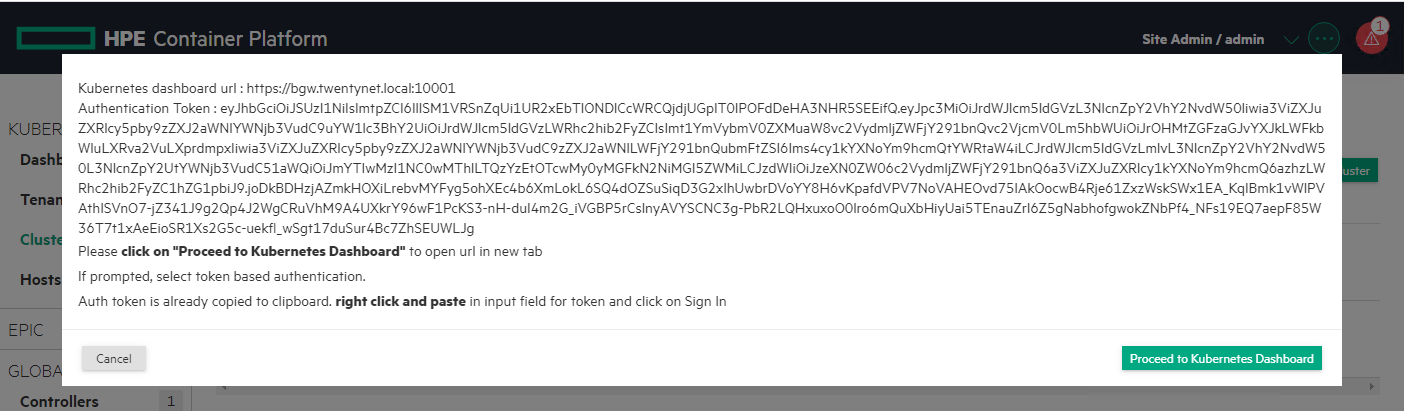
Figure 26. HPE Ezmeral Container Platform launching Kubernetes Dashboard- Auth Token
Paste the token value in the next screen and click Sign in.
Figure 27 depicts the HPE Ezmeral Container Platform launching Kubernetes Dashboard -- applying Auth token
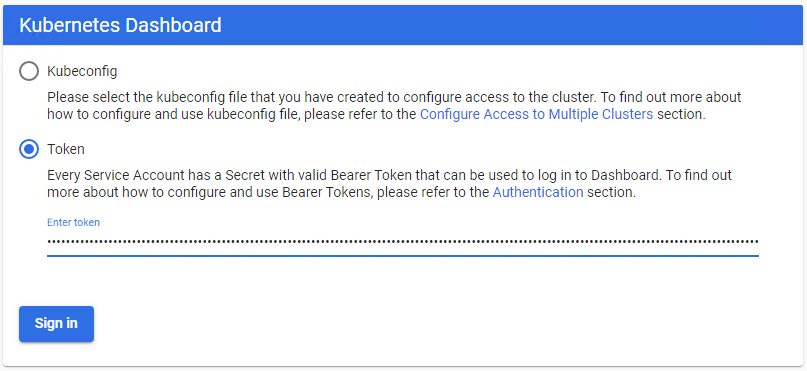
Figure 27. HPE Ezmeral Container Platform launching Kubernetes Dashboard -- applying Auth token
The Dashboard overview page appears. Figure 28 depicts the HPE Ezmeral Container Platform Kubernetes Dashboard.
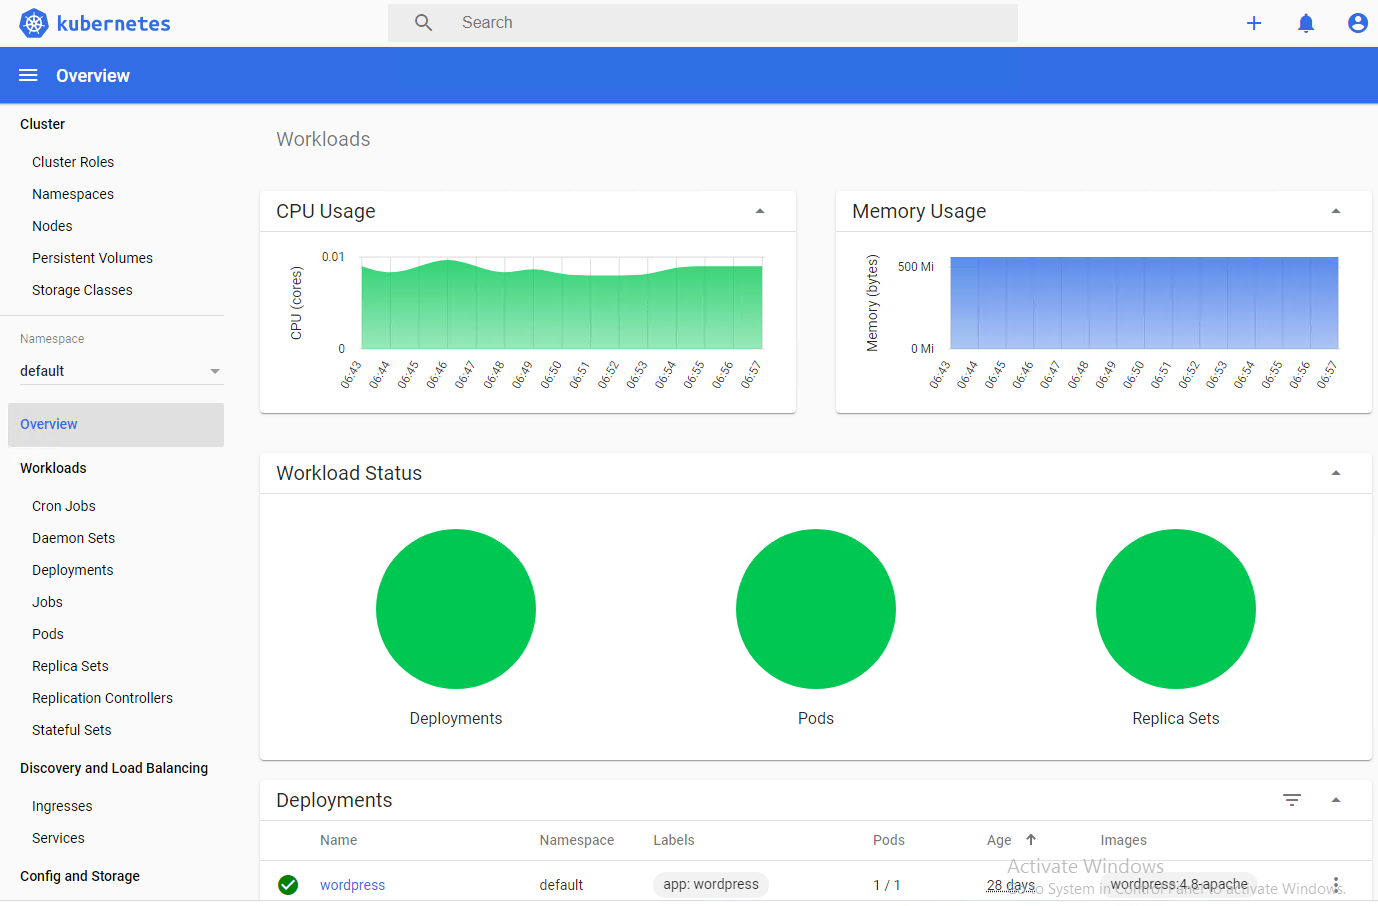
Figure 28. HPE Ezmeral Container Platform Kubernetes Dashboard